Showing posts with label Sallys. Show all posts

Sunday, July 6, 2025

Maple Pecan Snickerdoodles

Maple Pecan Snickerdoodles


Sally's Baking addiction photo!


5 Stars4 Stars3 Stars2 Stars
  • ]Prep Time: 2 hours, 30 minutes (includes chilling)
  • Cook Time: 13 minutes
  •  
  • Total Time: 2 hours, 50 minutes
  • Yield: 32-36 cookies
  • These maple pecan snickerdoodles are soft and chewy with irresistible maple and cinnamon flavors. Set aside at least 2 hours to chill the cookie dough before rolling and baking. See recipe notes for additional information about some key ingredients.

    Ingredients

    • 2 and 1/2 cups (313gall-purpose flour 
    • 1 teaspoon cream of tartar*
    • 1 teaspoon ground cinnamon
    • 1 teaspoon baking soda
    • 1/2 teaspoon salt
    • 3/4 cup (12 Tbsp; 170gunsalted buttersoftened to room temperature
    • 1/2 cup (100g) packed light or dark brown sugar
    • 1/2 cup (100ggranulated sugar
    • 1 large egg, at room temperature
    • 1/4 cup (60ml) pure maple syrup*
    • 1 teaspoon pure vanilla extract
    • 1 and 1/2 teaspoons maple extract*
    • 1 cup (130g) chopped pecans (plus pecan halves for topping)*

    Topping

    • 1/3 cup (70ggranulated sugar
    • 1 teaspoon ground cinnamon
    • optional for topping: 32-36 pecan halves

    Instructions

    1. Cookies: Whisk the flour, cream of tartar, cinnamon, baking soda, and salt together in a medium bowl. Set aside.
    2. Using a hand mixer or a stand mixer fitted with a paddle attachment, beat the butter, brown sugar, and granulated sugar together on medium speed until smooth, about 2 minutes. Add the egg and beat on high until combined, about 30 seconds. Scrape down the sides and bottom of the bowl as needed. Beat in the maple syrup, vanilla extract, and maple extract until combined.
    3. Pour the dry ingredients to the wet ingredients, and then beat on low until combined. Beat in the chopped pecans. Dough will be thick and soft.
    4. Cover and chill the dough for 2 hours in the refrigerator (and up to 3-4 days). If chilling for longer than a few hours, allow to sit at room temperature for at least 30 minutes before rolling and baking because the dough will be quite hard.
    5. Topping: Mix the granulated sugar and cinnamon together. Set aside.
    6. Preheat oven to 350°F (177°C). Line large baking sheets with parchment paper or silicone baking mats. Set aside.
    7. Roll cookie dough into balls, about 1.5 Tablespoons of dough per cookie.  Roll each ball generously into cinnamon sugar topping and place 2-3 inches apart on prepared baking sheets. Gently press a pecan half into the tops of each dough ball. (Not too hard or the pecan may break.)
    8. Bake for 13-14 minutes or until lightly browned around the edges. The centers will look very soft.
    9. Remove from the oven. If your warm cookies look puffy, lightly bang the pan on the counter when you remove it from the oven. That will help slightly deflate the cookies. Cool cookies on the baking sheets for 5 minutes before transferring to a wire rack to cool completely.
    10. Cover and store leftover cookies at room temperature for up to 1 week.

    Notes

    1. Make Ahead Instructions: You can make the cookie dough and chill it in the refrigerator for up to 3-4 days. Allow to come to room temperature then continue with step 5. Make sure that you let it come to room temperature before rolling the dough, coating in topping, and baking the cookies. You can also freeze the cookie dough balls. Roll the dough into balls then freeze the balls for up to 2-3 months. You can freeze the cookie dough balls with the cinnamon sugar topping or without, but I recommend freezing without the topping. When you are ready to bake, remove the balls from the freezer, let sit for 30 minutes, preheat the oven, and then roll into topping. You can also freeze the baked cookies for up to 3 months. Thaw overnight in the refrigerator before serving.
    2. Maple Syrup: Avoid “breakfast syrup” which doesn’t have the same robust maple flavor that pure syrup contains.
    3. Maple Extract: Pure maple syrup isn’t enough to guarantee mega maple flavor. Without the crutch of maple extract, the cookies lack flavor. I use McCormick maple extract. You can find it in the baking aisle.

    Thursday, December 15, 2022

    Soft Dinner Rolls Recipe

    From this blog

    Yield: 14-16 rolls


    Ingredients

    1 cup (240ml) whole milk, warmed to about 110°F (43°C)

    2 and 1/4 teaspoons Yeast 

    2 Tablespoons granulated sugar, divided

    1 large egg

    1/4 cup (60g) soft butter, cut into 4 pieces

    1 teaspoon salt

    3 cups (390g) all-purpose flour or bread flour


    Instructions

    Prepare the dough: Whisk the warm milk, yeast, and 1 Tablespoon of sugar together in the bowl of your stand mixer. Cover and allow to sit for 5 minutes. 


    Add the remaining sugar, egg, butter, salt, and flour. With a dough hook or paddle attachment, mix/beat on low speed for 30 seconds, scrape down the sides of the bowl with a rubber spatula, then add the remaining flour. Beat on medium speed until the dough comes together and pulls away from the sides of the bowl, about 2 minutes. If the dough seems too wet to a point where kneading (next step) would be impossible, beat in more flour 1 Tablespoon at a time until you have a workable dough, similar to the photos above. Dough should be soft and a little sticky, but still manageable to knead with lightly floured hands.


    Knead the dough in mixer for an additional 3 full minutes.


    1st Rise: Lightly grease a large bowl with oil or nonstick spray. Place the dough in the bowl, turning it to coat all sides in the oil. Cover the bowl with aluminum foil, plastic wrap, or a clean kitchen towel. Allow the dough to rise in a relatively warm environment for 1-2 hours or until double in size. 


    Grease a 9×13 inch baking pan or two 9-inch square or round baking pans. You can also bake the rolls in a cast iron skillet or on a lined baking sheet.


    Shape the rolls: When the dough is ready, punch it down to release the air. Divide the dough into 14-16 equal pieces. (Just eyeball it– doesn’t need to be perfect!) Shape each piece into a smooth ball. Arrange in prepared baking pan.


    2nd Rise: Cover shaped rolls with aluminum foil, plastic wrap, or a clean kitchen towel. Allow to rise until puffy, about 1 hour.


    Adjust oven rack to a lower position and preheat oven to 350°F. (It’s best to bake the rolls towards the bottom of the oven so the tops don’t burn.)


    Bake the rolls: Bake for 20-25 minutes or until golden brown on top, rotating the pan halfway through. If you notice the tops browning too quickly, loosely tent the pan with aluminum foil. Remove from the oven, brush with butter or optional honey butter topping, and allow rolls to cool for a few minutes before serving.


    Cover leftover rolls tightly and store at room temperature for 2-3 days or in the refrigerator for up to 1 week.


    Notes

    Freezing Instructions: Prepare recipe through step 6. Place shaped rolls in a greased baking pan, cover tightly, and freeze for up to 3 months. Once frozen, the dough balls won’t stick together anymore and you can place them in a freezer bag if needed. On the day you serve them, arrange the dough balls in a greased baking pan, cover tightly, then let them thaw and rise for about 4-5 hours. Bake as directed. You can also freeze the baked dinner rolls. Allow them to cool completely, then freeze for up to 3 months. Thaw in the refrigerator or at room temperature, then reheat as desired. If reheating the whole pan, lightly cover and reheat in a 300°F (149°C) oven for about 10 minutes or until warm.

    Overnight Instructions: Prepare the recipe through step 6. Cover the shaped rolls tightly and refrigerate for up to about 15 hours. At least 3 hours before you need them the next day, remove the rolls from the refrigerator, keep covered, and allow to rise on the counter for about 1-2 hours before baking. Alternatively, you can let the dough have its 1st rise in the refrigerator overnight. Cover the dough tightly and place in the refrigerator for up to about 15 hours. Remove from the refrigerator and allow the dough to fully rise for 2 more hours. Continue with step 5.

    Baking Pan: I prefer baking the rolls in a glass 9×13 inch baking pan because I find they brown a little too quickly in metal. As long as you bake the rolls on a lower oven rack and keep your eye on them, any pan is great.

    Flour: You can use all-purpose flour or bread flour. All-purpose flour is convenient for most, but bread flour produces chewier dinner rolls. The rolls are still soft and fluffy no matter which you use. Either flour is fine and there are no other changes to the recipe if you use one or the other.

    Tuesday, June 25, 2019

    Big Fat Peanut Butter Oatmeal Chocolate Chip Cookies


    Description

    Big fat peanut butter oatmeal chocolate chip cookies are easy, thick, and exploding with peanut butter, oats, and chocolate chips to satisfy your cookie cravings.

    Ingredients

    • 1 and 1/2 cups (180g) all-purpose flour (spoon & leveled)
    • 1 teaspoon baking powder
    • 1 teaspoon baking soda
    • 1 teaspoon salt
    • 1 cup (2 sticks; 235g) unsalted butter, softened to room temperature
    • 1 cup (200g) granulated sugar
    • 1/2 cup (100g) packed light or dark brown sugar
    • 2 large eggs, at room temperature
    • 1 cup (260g) creamy peanut butter
    • 2 teaspoons pure vanilla extract
    • 2 cups (180g) old-fashioned whole rolled oats
    • 2 and 1/2 cups (450g) semi-sweet chocolate chips, plus more for topping if desired

    Instructions

    1. Whisk the flour, baking powder, baking soda, and salt together in a medium bowl. Set aside.
    2. In a large bowl using a hand mixer or a stand mixer fitted with a paddle attachment, beat the butter on medium-high speed until smooth, about 1 minute. Add the granulated sugar and brown sugar and beat on medium-high speed until creamed, about 2 minutes. Add the eggs, peanut butter, and vanilla and beat on high speed until combined, about 1 minute. Scrape down the sides and up the bottom of the bowl and beat again as needed to combine.
    3. Add the dry ingredients to the wet ingredients and mix on low until combined. With the mixer running on low speed, add the oats. Once combined, beat in the chocolate chips. Dough will be thick and sticky. Cover and chill the dough for at least 20 minutes in the refrigerator (and up to 4 days). If chilling for longer than 1 hour, allow to sit at room temperature for at least 30 minutes before rolling and baking because the dough will be quite hard.
    4. Preheat oven to 350°F (177°C). Line baking sheets with parchment paper or silicone baking mats. Set aside.
    5. Scoop balls of dough, 2 Tablespoons of dough per cookie, and arrange 3 inches apart on the baking sheets. Bake for 12-14 minutes until lightly browned on the sides. The centers will look very soft.
    6. Remove from the oven and allow to cool on baking sheet for 5 minutes before transferring to a wire rack to cool completely. While the cookies are still warm, I like to press a few more chocolate chips into the tops– this is only for looks!
    7. Cookies stay fresh covered at room temperature for up to 1 week.

    Peanut Buter Cup Oatmeal Cookies

    A Sally's recipe


    Ingredients:

    • 3/4 cup (95g) all-purpose flour (spoon & leveled)
    • 1/4 teaspoon salt
    • 1/2 teaspoon baking soda
    • 1/2 teaspoon baking powder
    • 1/2 cup (115g) unsalted butter, melted (or salted)
    • 1/2 cup (100g) granulated sugar
    • 1/2 cup (100g) packed dark brown sugar (or light brown)
    • 1 large egg
    • 1/2 cup (125g) creamy peanut butter (not natural style)
    • 2 teaspoons vanilla extract
    • 2 cups (160g) quick oats1
    • 1 and 1/2 cups chopped Reese's Peanut Butter Cups, divided

    Directions:

    1. Preheat oven to 350°F (177°C). Line two large baking sheets with parchment paper or silicone baking mats. Set aside.
    2. Toss the flour, salt, baking soda, and baking powder together in a large bowl. Set aside.
    3. In a medium bowl, whisk the melted butter, granulated sugar, and brown sugar together until no brown sugar lumps remain. Whisk in the egg, then the peanut butter until combined. Finally, whisk in the vanilla. Pour the wet ingredients into the dry ingredients and mix together with a large spoon or rubber spatula. The dough will be very soft and slick. Fold in the oats and the 1 and 1/4 cups chopped peanut butter cups, reserving the remaining 1/4 cup for later.
    4. Roll the dough into balls, about 3 Tablespoons of dough each. I highly suggest using a cookie scoop to make it easier. Place 8 balls of dough onto each cookie sheet.
    5. Bake the cookies for 11-12 minutes. The cookies will look very soft and underbaked. They will continue to bake on the cookie sheet. Remove from the oven and lightly press down on each cookie to slightly flatten, since the cookies will not spread all the way in the oven. Press a piece or two of the remaining chopped peanut butter cups into each cookie. Allow to cool on the cookie sheet for 10 minutes before moving to a wire rack to cool completely.

    Soft-Baked Monster Cookies


    Description

    These are the best monster cookies ever! They’re deliciously packed with peanut butter, oats, M&Ms, and chocolate chips. No bite is boring! The cookies are soft-baked style and extra thick. No cookie dough chilling required, so this cookie recipe is simple and quick! 

    Ingredients

    • 1/2 cup (1 stick or 115g) salted butter, softened to room temperature*
    • 1/2 cup (100g) packed light brown sugar
    • 1/4 cup (50g) granulated sugar
    • 3/4 cup (185g) creamy peanut butter
    • 1 large egg, at room temperature*
    • 1 teaspoon pure vanilla extract
    • 1/2 teaspoon baking soda
    • 1 and 1/4 cups (160g) all-purpose flour (spoon & leveled)
    • 1/2 cup (40g) quick oats*
    • 3/4 cup (150g) M&Ms (any size or variety)
    • 1/2 cup (90g) semi-sweet chocolate chips

    Instructions

    1. Preheat oven to 350°F (177°C). Line baking sheet with parchment paper or silicone baking mat.
    2. In a large bowl, using a hand-held mixer or stand mixer with paddle attachment, cream the butter and sugars together on medium speed, about 3 minutes. Mix in the peanut butter, egg, and vanilla (in that order). Scrape down the sides of the bowl as needed. Slowly mix in the baking soda and flour. Do not over-mix. On low speed, beat in the quick oats, M&Ms, and chocolate chips just until incorporated. If the dough is very soft and unmanageable by hand, chill the dough for 30 minutes before rolling.
    3. Rolls balls of dough, about 2 Tablespoons of dough per ball, onto prepared baking sheet. Press a few extra M&Ms on top for looks, if preferred. Bake for 11-13 minutes– the cookies will still look a little soft, which is recommended. Slightly press down the baked cookies with the back of a spoon, since the cookies only slightly spread in the oven. Allow cookies to cool on baking sheet for 10 minutes before transferring to a wire rack. Cookies will firm up as they cool.
    4. Store cookies covered at room temperature for up to 1 week.

    Monday, June 10, 2019

    Homemade Berry Fritters


    Prep Time: 2 hours, 30 minutes Cook Time: 10 minutes Total Time: 2 hours, 40 minutes Yield: 12 large fritters
    Description


    This sweet summery fried fritter combines a soft yeasted dough, blueberries, and a creamy strawberry glaze made from real strawberries.

    Ingredients

    1 cup (240ml) whole milk, warmed to about 110°F*
    1 Tablespoon active dry yeast
    1/2 cup (100g) granulated sugar, divided
    2 large eggs
    6 Tablespoons (86g) butter, melted and slightly cooled
    1 teaspoon pure vanilla extract
    1/2 teaspoon salt
    1/4 teaspoon ground nutmeg
    4 cups (490g) all-purpose flour (spoon & leveled), plus more as needed
    1 and 1/2 cups (250g) fresh berries such as blueberries, chopped strawberries, or blackberries (NOT frozen)
    1 – 2 quarts oil

    STRAWBERRY GLAZE

    2 cups (240g) confectioners’ sugar
    1 cup chopped strawberries (about 5 large strawberries)
    1/4 cup (60ml) heavy cream, half-and-half, or whole milk
    1 teaspoon pure vanilla extract
    Instructions

    Prepare the dough: Whisk the warm milk, yeast, and 1 Tablespoon of sugar together in the bowl of your stand mixer fitted with a dough hook or paddle attachment. Cover and allow to sit for 5 minutes.
    Add the remaining 7 Tablespoons of sugar, eggs, butter, vanilla extract, salt, nutmeg, and 1 cup flour. Beat on low speed for 30 seconds, scrape down the sides of the bowl with a rubber spatula, then add the remaining flour. Beat on medium speed until the dough comes together and pulls away from the sides of the bowl, about 2 minutes. If needed, add more flour, 1 Tablespoon at a time, until the dough pulls away from the sides of the bowl. Don’t add too much flour, though. You want a slightly sticky dough. 

    Knead the dough: Keep the dough in the mixer and beat for an additional 2 minutes or knead by hand on a lightly floured surface for 2 minutes.

    Rise: Lightly grease a large bowl with oil or nonstick spray. Place the dough in the bowl, turning it to coat all sides in the oil. Cover the bowl with aluminum foil, plastic wrap, or a clean kitchen towel. Allow the dough to rise in a relatively warm environment for 1-2 hours or until double in size. (I always let it rise on the counter. Takes about 2 hours.)

    Shape the dough: When the dough is ready, punch it down to release the air. Turn it out onto a lightly floured work surface and with lightly floured hands, flatten the dough into a long oval about 1/2 inch thick. You can use a rolling pin if needed, but your hands should be able to stretch it out just fine. Spread blueberries onto half of the dough, as pictured above. Fold the dough over the blueberries, then seal the edges. Using your hands, work the dough into an even log. making sure the edges are totally sealed. Using a sharp knife or bench scraper, cut the dough into about 12 even strips, then cut 4-5 perpendicular strips to make a cross pattern of sorts. This is NOT an exact process, so don’t stress. You really just need a bunch of small pieces of blueberry-filled dough! Divide the cut-up dough into 12 even pieces. Mold each into a round shape and try to “enclose” the blueberries inside the dough as much as you can. (They’ll fall out of the fritters otherwise.) Place the shaped fritters on a lined baking sheet, then cover and allow to rest as you heat the oil. They will rise a bit as they rest.
    Place a cooling rack on a large baking sheet. Set aside.

    Pour oil into a large heavy-bottomed pot set over medium heat. Using a candy/oil thermometer, heat the oil to 350°F (177°C). This will take several minutes. Add 2 fritters at a time and fry for 1-2 minutes on each side or until golden brown. Wear kitchen gloves if oil is splashing. Carefully remove with a metal spatula or metal slotted spoon. Place fritters onto prepared rack. Repeat with remaining fritters, then turn off the heat.* Some blueberries may come loose in the oil. Discard those since they’ll taste burnt.

    Let the fritters cool for a few minutes as you prepare the glaze.
    Strawberry Glaze: Place confectioners’ sugar in a medium bowl. Set aside. Purée the strawberries in a food processor. Scrape down the sides if needed. If they aren’t pureeing into a liquid, add 1 Tablespoon of the heavy cream, half-and-half, or milk you are using in the glaze. Once liquified, pour over confectioners’ sugar, then add the cream/milk, and vanilla extract. Whisk until smooth. If needed, add more cream/milk to thin out or more confectioners’ sugar to thicken.
    Dunk each fritter into glaze. Place back onto prepared rack for excess glaze to drip down. The glaze will eventually set on the fritters after about 20-30 minutes.
    Fritters are best enjoyed the same day. Cover and store leftovers at room temperature for 1 day or in the refrigerator for up to 3 days. Reheat in the microwave.
    Notes

    Berries: Go light on the blueberries in the dough– 1 and 1/2 cups is plenty. If you use too many, they’ll just fall out of the frying fritters and burn. You can also use blackberries or chopped strawberries. I recommend fresh blueberries because they aren’t as juicy. Frozen berries or juicier berries make this dough a mess! Instead of strawberries for the glaze, you can use fresh or frozen (thawed) raspberries or blackberries. Blueberries aren’t ideal for the glaze because they don’t purée as well.

    Oil: The amount of oil really depends on how wide or tall your pot is. You want oil to fill about 1/3 of the pot. I use a little more than 1 quart for my 5.5 quart Dutch oven.

    Halve: You can easily halve this recipe for 6 large fritters. I don’t recommend doubling the recipe. Instead, make two separate batches of dough.

    Sunday, June 2, 2019

    Shortbread Lemon Bar

    1 cup (230g; 2 sticks) unsalted butter, melted
    1/2 cup (100g) granulated sugar
    2 teaspoons pure vanilla extract
    1/2 teaspoon salt
    2 cups + 2 Tablespoons (265g) 
    all-purpose flour

    Lemon Filling

    2 cups (400g) granulated sugar
    6 Tablespoons (48g) all-purpose flour
    6 large eggs
    1 cup (240ml) lemon juice (about 4 lemons)


    Instructions

    Preheat the oven to 325°F (163°C). Line the bottom and sides of a 9×13 baking pan* with parchment paper, leaving an overhang on the sides to lift the finished bars out (makes cutting easier!). Set aside.

    Make the crust: Mix the melted butter, sugar, vanilla extract, and salt together in a medium bowl. Add the flour and stir to completely combine. The dough will be thick. Press firmly into prepared pan, making sure the layer of crust is nice and even. Bake for 18-20 minutes or until the edges are very lightly browned.
    Make the filling: Sift the sugar and flour together in a large bowl. Add the eggs and lemon juice and whisk until completely combined.

    Pour filling over warm crust. Bake the bars for 22-26 minutes or until the center is relatively set and no longer jiggles. (Give the pan a light tap with an oven mitt to test.) Remove bars from the oven and cool completely at room temperature. I usually cool them for about 2 hours at room temperature, then stick in the refrigerator for 1-2 more hours until pretty chilled. I recommend serving chilled.

    Once cool, lift the parchment paper out of the pan using the overhang on the sides. Dust with confectioners’ sugar and cut into squares before serving. For neat squares, wipe the knife clean between each cut. Cover and store leftover lemon bars in the refrigerator for up to 1 week.

    Freezing Instructions: Lemon bars can be frozen for up to 3-4 months. Cut the cooled bars (without confectioners’ sugar topping) into squares, then place onto a baking sheet. Freeze for 1 hour. Individually wrap each bar in aluminum foil or plastic wrap and place into a large bag or freezer container to freeze. Thaw in the refrigerator, then dust with confectioners’ sugar before serving.

    Monday, May 13, 2019

    Salted Caramel Dark Chocolate Cookies

    From: Sally's Baking Addiction

    Ingredients:

    • 1/2 cup (115g) unsalted butter, softened to room temperature
    • 1/2 cup (100g) granulated sugar
    • 1/2 cup (100g) packed light or dark brown sugar
    • 1 large egg, room temperature preferred
    • 1 teaspoon vanilla extract
    • 1 cup (125g) all-purpose flour (spoon & leveled)
    • 2/3 cup (58g) unsweetened cocoa powder
    • 1 teaspoon baking soda
    • 1/8 teaspoon salt
    • 2 Tablespoons (30ml) milk
    • 1 and 1/2 cups (270g) Nestlé® Toll House® Dark Chocolate Morsels
    • 16-17 chocolate coated caramels, such as Rolos
    • coarse sea salt

    Directions:

    1. Using a handheld or stand mixer with a paddle attachment, cream the butter on medium speed for about 20 seconds. Add the sugars with the mixer running on medium speed. Cream it all together until light and fluffy. Beat in the egg and vanilla. Scrape down the sides of the bowl as needed.
    2. In a separate medium size bowl, sift the flour, cocoa powder, baking soda, and salt together. Slowly add to the wet ingredients. Stir in the milk, then fold in the dark chocolate morsels. The dough will be thick and very sticky. Chill for at least 1-2 hours.
    3. Preheat oven to 350°F (177°C). Line a large baking sheet with parchment paper or silicone baking mat. Set aside.
    4. Take 2 Tablespoons of chilled dough and split in half and roll each into a ball with your hands. Stick a caramel into 1 ball of dough. Top the caramel with the other ball of dough and seal down the sides so that the caramel is securely stuffed inside. Repeat with the rest of the dough and 18 caramel candies. Sprinkle each with sea salt before putting into the oven.
    5. Bake for 12-13 minutes. Cookies will appear undone and very soft. Allow to cool on the cookie sheet for at least 5 minutes before transferring to a wire rack to cool completely.


    Monday, March 11, 2019

    Dark Chocolate Frosting

    ·       5.5 cup (330 grams) confectioners' sugar
    ·       1 1/3 cup (57 grams) unsweetened cocoa powder
    ·       ¾ cups unsalted butter, softened to room temperature
    ·       ¾ cups heavy cream (About!)
    ·       2 teaspoon vanilla extract


    • For the frosting: Sift together the confectioners' sugar and cocoa powder to assure there are no lumps. Set aside.
    • With a handheld of stand mixer, beat the butter at medium speed until fluffy - about 2 minutes. Gradually add the sifted sugar/cocoa powder alternately with the heavy cream and vanilla. Beat on low speed after each addition. Add more powdered sugar if frosting is too dark. Add a pinch of salt if frosting is too sweet.

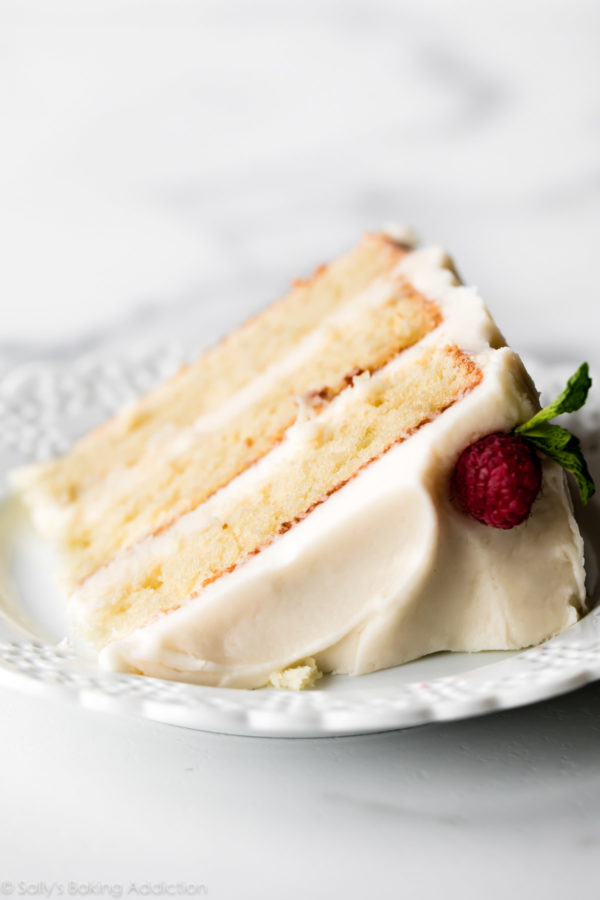
    Vanilla Cake W/ white OR chocolate frosting

    Sally's Link to frosting 

    Ingredients

    3 and 2/3 cups (420g) cake flour* (spoon & leveled)
    1 teaspoon salt
    1 teaspoon baking powder
    3/4 teaspoon baking soda
    1 and 1/2 cups (345g) unsalted butter, softened to room temperature
    2 cups (400g) granulated sugar
    3 large eggs + 2 additional egg whites, at room temperature*
    1 Tablespoon pure vanilla extract (yes, Tbsp!)
    1 and 1/2 cups (360ml) buttermilk, at room temperature*

    Vanilla Buttercream (or Chocolate below!)

    1 and 1/2 cups (345g) unsalted butter, softened to room temperature
    6 cups (720g) confectioners’ sugar
    1/3 cup (80ml) whole milk or heavy cream
    1 and 1/2 teaspoons pure vanilla extract
    1/8 teaspoon salt
    Instructions

    Preheat oven to 350°F (177°C). Grease three 9-inch cake pans, line with parchment paper, then grease the parchment paper. Parchment paper helps the cakes seamlessly release from the pans.
    Make the cake: Whisk the cake flour, salt, baking powder, and baking soda together. Set aside.
    Using a handheld or stand mixer fitted with a paddle or whisk attachment, beat the butter and sugar together on high speed until smooth and creamy, about 3 minutes. Scrape down the sides and up the bottom of the bowl with a rubber spatula as needed. Beat in the 3 eggs, 2 egg whites, and vanilla extract on high speed until combined, about 2 minutes. (Mixture will look curdled as a result of the egg liquid and solid butter combining.) Scrape down the sides and up the bottom of the bowl as needed. With the mixer on low speed, add the dry ingredients just until combined. With the mixer still running on low, pour in the buttermilk and mix just until combined. You may need to whisk it all by hand to make sure there are no lumps at the bottom of the bowl. The batter will be slightly thick.
    Pour batter evenly into cake pans. Weigh them to ensure accuracy, if desired. Bake for around 23-26 minutes or until the cakes are baked through. To test for doneness, insert a toothpick into the center of the cake. If it comes out clean, it’s done. Allow cakes to cool completely in the pans set on a wire rack. The cakes must be completely cool before frosting and assembling.
    Make the frosting: In a large bowl using a hand-held mixer or stand mixer fitted with a whisk or paddle attachment, beat the butter on medium speed until creamy, about 2 minutes. Add confectioners’ sugar, milk, vanilla extract, and salt with the mixer running on low. Increase to high speed and beat for 3 minutes. Add more confectioners’ sugar if frosting is too thin, more milk if frosting is too thick, or an extra pinch of salt if frosting is too sweet.
    Assemble and decorate: Using a large serrated knife, slice a thin layer off the tops of the cakes to create a flat surface. Discard (or crumble over ice cream!). Place 1 cake layer on your cake stand, cake turntable, or serving plate. Evenly cover the top with about 1 and 1/2 cups of frosting. Top with 2nd cake layer and evenly cover the top with about 1 and 1/2 cups of frosting. Top with the third cake layer. Spread the remaining frosting all over the top and sides. I use and recommend an icing spatula to apply the frosting.
    Refrigerate cake for at least 1 hour before slicing. This helps the cake hold its shape when cutting.


    Chocolate Frosting
    ·       5.5 cup (330 grams) confectioners' sugar
    ·       1 1/3 cup (57 grams) unsweetened cocoa powder
    ·       ¾ cups unsalted butter, softened to room temperature
    ·       ¾ cups heavy cream -About!( I use almond milk instead) 
    ·       2 teaspoon vanilla extract
    • For the frosting: Sift together the confectioners' sugar and cocoa powder to assure there are no lumps. Set aside.
    • With a handheld of stand mixer, beat the butter at medium speed until fluffy - about 2 minutes. Gradually add the sifted sugar/cocoa powder alternately with the heavy cream and vanilla. Beat on low speed after each addition. Add more powdered sugar if frosting is too dark. Add a pinch of salt if frosting is too sweet.